Looking to create a timelapse from a series of photos you just shot!? Great! Whether you have a Mac or a Windows, here we will review different methods to create a timelapse video from series of photos taken in sequence. Let’s start!
In this post, we’ll cover three different methods to compile a timelapse video from still images. These three methods are applicable for both Windows and Mac computers, as we’ll cover how to apply this technique using three popular free video editing apps: iMovie, Quicktime and Windows Movie Maker (Windows Photos App).
iMovie
iMovie is an free and built-in app inside every Apple device so is a really good option if you’re starting to create timelapse from photography. These are the steps to follow:
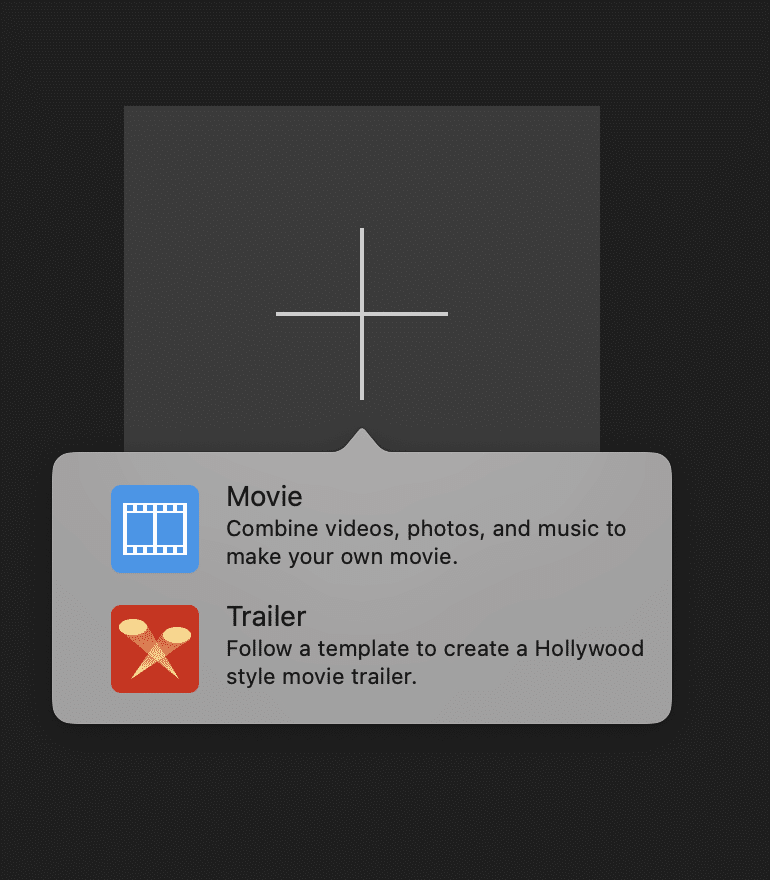
- Open iMovie and create a new project. Remember to click on “Movie” and not “Trailer”!
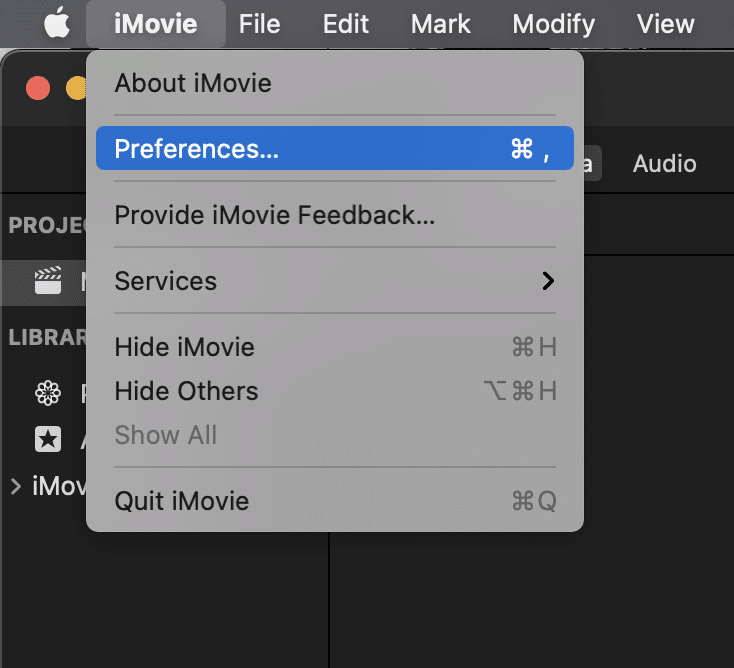
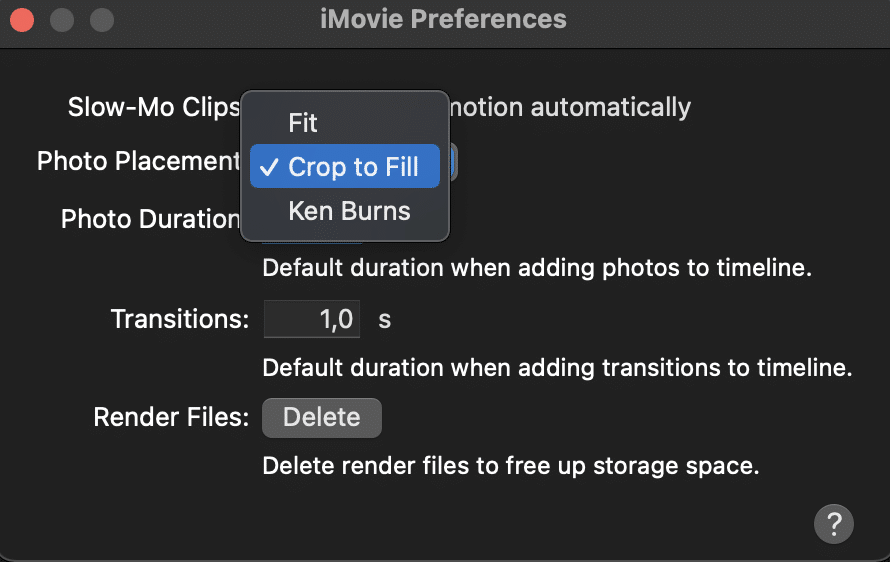
- Click on the iMovie logo (in the upper left of your screen) and click “Preferences”
- It will open a new window, in the Photo Duration space include “0,1 seconds”. From now on, iMovie will understand each photo as a video of 0,1 seconds long.
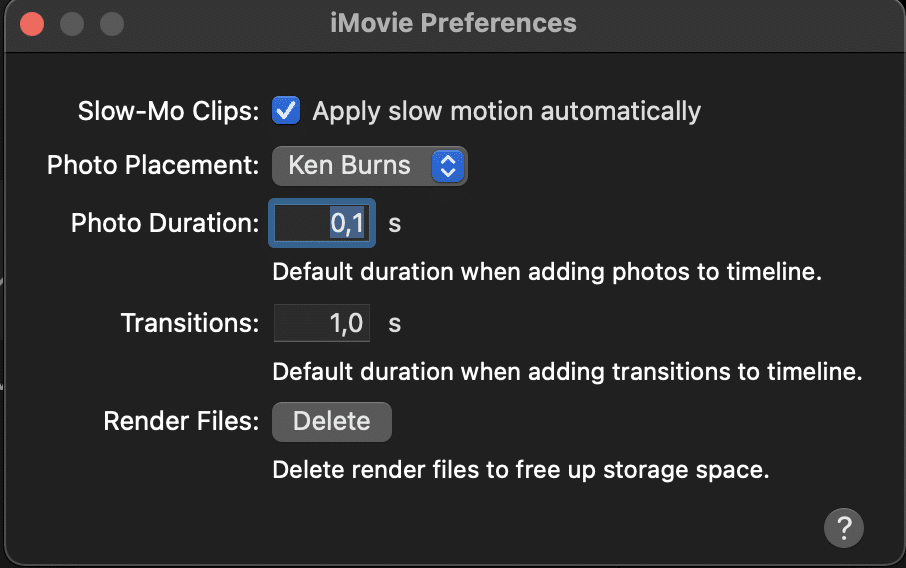
- In the same window, go to “Photo Placement” and change the option to “Crop to fill”
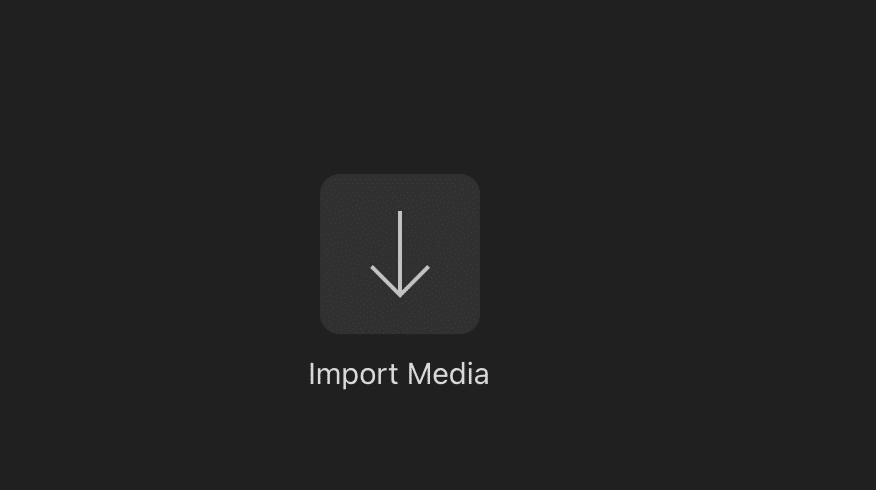
- Press the “Import media” button and select all your series of photos by pressing Command +A and then hit “Import All”
- Press “Command + A” over your photos again and drag them into the timeline.
- The footage will be played at 10 frames per second. Normal videos often display at 25 or 30 FPS. If you see that the video is not playing smoothly click on the “Crop” logo and choose again the option “Crop to fill”

- Now the process gets a little weird. We will need to export the file, then import it again and speed the video up.
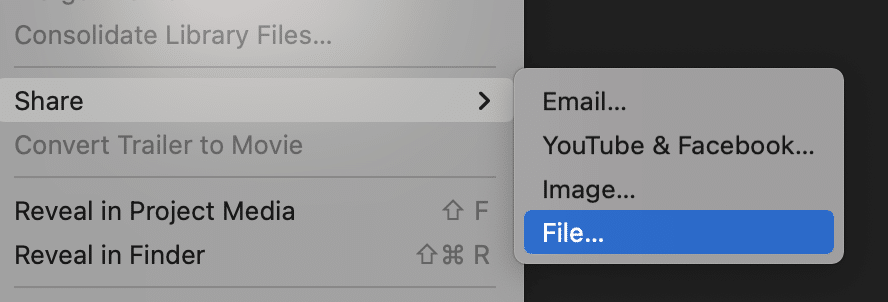
- So, now click on File > Share > File and save it in your computer.
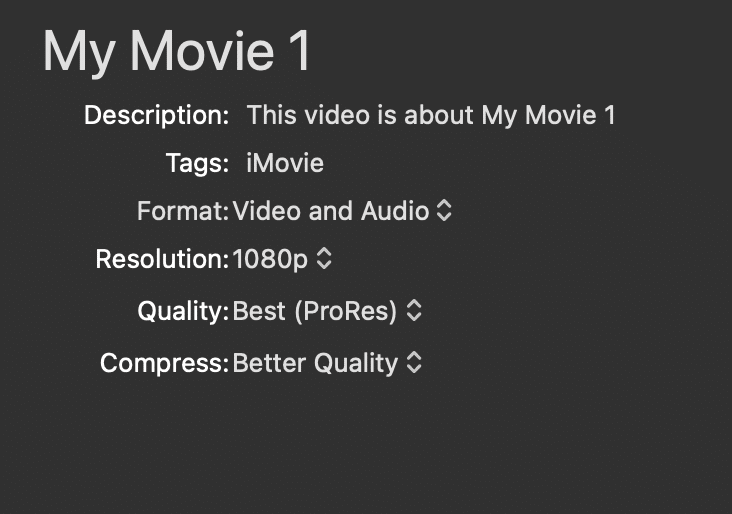
- When saving it, set the following settings
- Now, import your saved file again into iMovie and drag it into the timeline, removing the previous material.
- So now we have to speed it up to timelapse speed, for that, click on the little speed logo button

- In the speed menu, select “Custom” and set the speed either 250% or 300%, depending if you prefer 25 or 30 FPS

- Now your timelapse video should run smoothly! To export it click again File>Share>File and save it in your computer.
- Enjoy your cool timelapse video!
Windows Photos app
If you’re using Windows, Photos app is a free tool that it’s included in all its devices. These are the steps to follow:
- Open Windows Photos app and import the sequence of photos that will be turned into a timelapse video
- To import the photos, select “Import” on the left menu. A windows will appear, get to the file where your photos are and select all of them by pressing “Ctrl + A” and hit import.
- Once imported, select on the top menu Tools>Edit and open the menu “Speed”
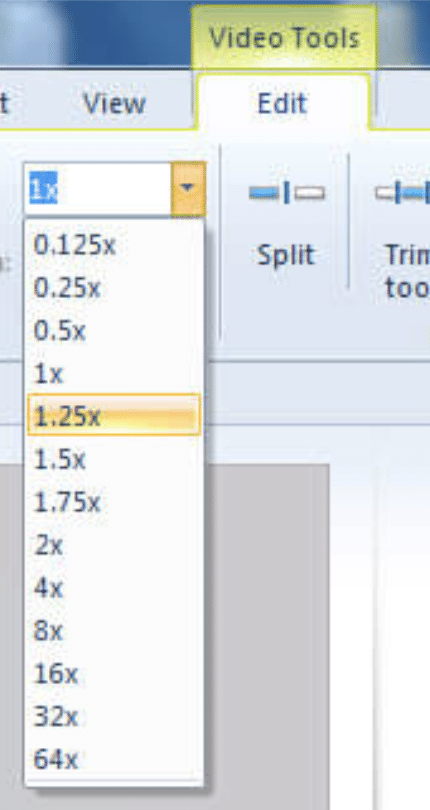
- The proper timelapse speed will be between 4x and 16x, try them to find the speed that suits you.
- Once you’re happy with the final video, got to the right top menu and click “Save Movie” to save it in your computer.
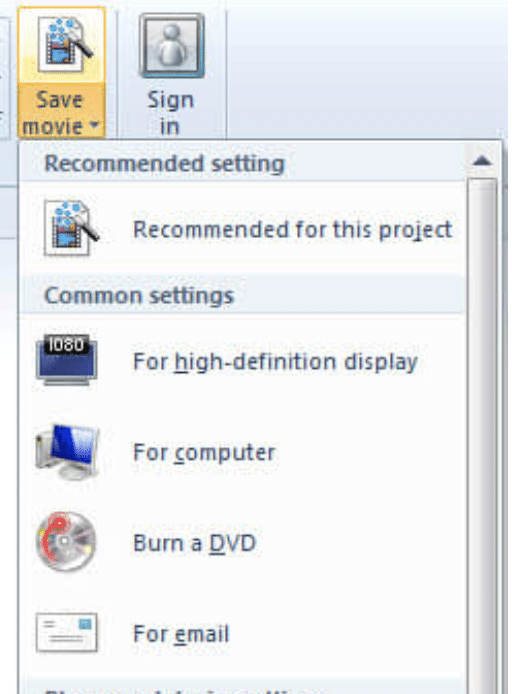
- Enjoy your new awesome timelapse video!
QuickTime Player
QuickTime Player is another free and built-in app available in all Mac. These are the steps to follow:
- Open QuickTIme Player and click File > Open Image Sequence
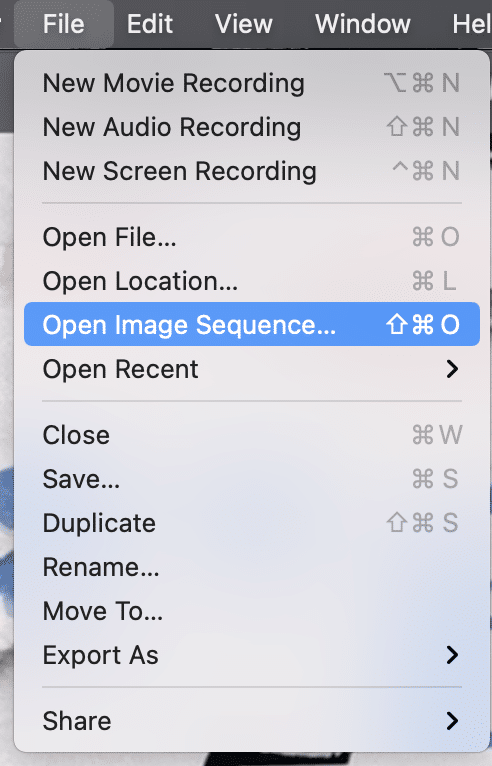
- Select your sequences of photos that you want to turn into a timelapse
- A new window will pop up asking you to adjust your settings. The recommendation is to maintain the Actual Size resolution, a frame rate of 25 FPS and encode for Higher Quality (ProRes).
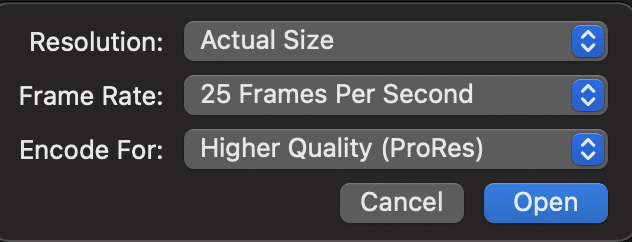
- The timelapse video is ready! Now click File>Save and determine where will you save your new timelapse video.
- Enjoy your amazing new timelapse video!
Conclusion
In this post, we’ve shown you some great methods to turn your still images into a great timelapse video.
We have presented three options to consider: iMovie, Windows Movie Maker and Quicktime Player, so we hope you’re are now skilled enough to start creating amazing timelapses!
