
The iPhone time lapse feature was first introduced in iOS 8 (2014) as one of the two new features in the Camera app. Since then, Apple made it easier than ever for people to record and share their own timelapse videos. But what are exactly those?
Contents
- 1 What is the time lapse on iPhone?
- 2 How to make a time lapse video on iPhone?
- 3 Tips to take time-lapses on iPhone like a professional
- 4 About the iPhone time lapse speed
- 5 iPhone time lapse settings
- 6 How to slow down a time lapse on iPhone?
- 7 How do you speed up a time lapse on iPhone?
- 8 How long can a time lapse video on iPhone be?
- 9 How to add music to a time lapse on iPhone?
- 10 How to convert a time lapse video to normal on iPhone
- 11 How to convert video to time lapse on iPhone
- 12 How to create time lapse video from photos on iPhone
What is the time lapse on iPhone?
The time lapse is a feature on the iPhone camera app that allows you to record a very short video (usually only 30-40 seconds long) that can compress hours or even days of recording. This makes the final video appear as if it has been sped up.
How to make a time lapse video on iPhone?
To make a time lapse video on iPhone, just open your Camera app, scroll left on the camera mode selection wheel until “Time-Lapse” is selected and start recording! The camera will now take a shot every few seconds and at the end it will stitch them all up together into a time-lapse video in your iPhone camera roll.

And that’s it! If you were wondering how to use the time lapse on iPhone, that was it, there’s no more steps! Right after tapping the stop button, the timelapse video should appear directly on your gallery – maybe allow it some seconds to process it if had been recording for a lot of time, but it should take a very short time. Now you know how to time-lapse on iPhone!
Tips to take time-lapses on iPhone like a professional
Anyone can take iPhone time-lapses, but if you’re aiming for tip-top quality, follow these tips!
- Make sure you have enough free space on your iPhone! There’s nothing more frustrating than realizing your time-lapse was interrupted and not saved because your device ran out of space
- Connect your iPhone to a power outlet! Time-lapses often take long, and batteries drain quickly while recording
- Lock focus and exposure. You do this by long pressing the screen before starting to record until you see a yellow rectangle. If you don’t do this, your iPhone will try to automatically adjust focus and exposure depending on the current lighting conditions, which will vary in a long time-lapse (AF = AutoFocus; AE = AutoExposure). So to make your final video as seamless as possible, so it looks like a constant flow rather than a series of clips taped together, make sure to lock AF/AE!
- Use a tripod. No matter how still you think you are, your hands are always shaking, and the iPhone camera will capture even the slightest movements. Make sure you’re using a tripod or you’re resting the iPhone on a sturdy surface.
- If you don’t have a tripod, use your imagination to make a good iPhone stand! A desk pen stand is often a good alternative, since you can (carefully) insert your iPhone between the pens and the created tension will support the iPhone for long enough to take a time-lapse.
- Another alternative is to use any garment or bag to support your iPhone. Just make sure the surfaces aren’t slippery or your phone will constantly fall over!
About the iPhone time lapse speed
The time-lapse feature on the iPhone camera does not behave in the way a typical time-lapse recording software does, because it automatically optimizes the settings of every timelapse to end up yielding a video between 20 and 40 seconds.
For this reason, it’s not easy to know how much time has really been recorded just seeing the final time-lapse video.
If you’re really interested in knowing how does the iPhone time-lapse work, make sure to check out our iPhone time-lapse calculator, where we also go into great depth and detail about how it works!

iPhone time lapse settings
Unfortunately for us creators, there’s no easy way of adjusting the settings on the iPhone time lapse camera mode, so we’re stuck with Apple’s defaults. This means the preferences that define the time-lapse feature on the iPhone camera, like the interval capture rate speed, the final video FPS and all that are hardcoded into the app and cannot be changed. There’s more info about this in our iPhone time-lapse calculator.
How to slow down a time lapse on iPhone?
One of the most common questions regarding this feature is related to the timelapse video speed. Can you slow down a time lapse on iPhone?
Well, the short answer is: yes, but not from the Camera. As we’ve discussed earlier, we’re stuck with Apple’s defaults, that is, the iPhone time-lapse preferences are hardcoded and cannot be changed in the device or the app. So we can’t modify critical parameters like the timelapse capture rate / interval (how many shots does it take in a second) or the final video FPS (Frames Per Second, which also defines the speed at which the resulting video will be played back)
However, there are a couple of ways around this. So if you’re really willing to learn how to change the time lapse speed on iPhone, keep reading!
There’s no way of slowing down the time lapse on iPhone while recording, but what you could do is you could record your time-lapse as normal and then import it into a video editing app, like the iMovie app, and manually slow it down!
This is fairly easy to do. First, get the iMovie app from the App Store if you haven’t already. Open the iMove app and get ready to slow down your time-lapse video!
Time needed: 5 minutes.
How to slow down a time-lapse on iPhone using the iMovie app
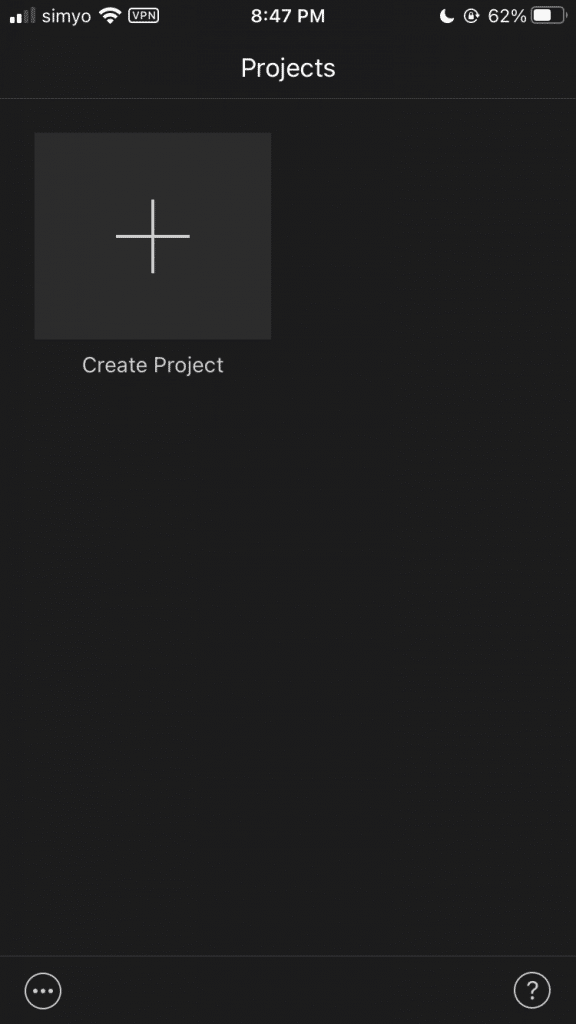
- Tap the big “+” plus button on the main iMovie screen to create a new project
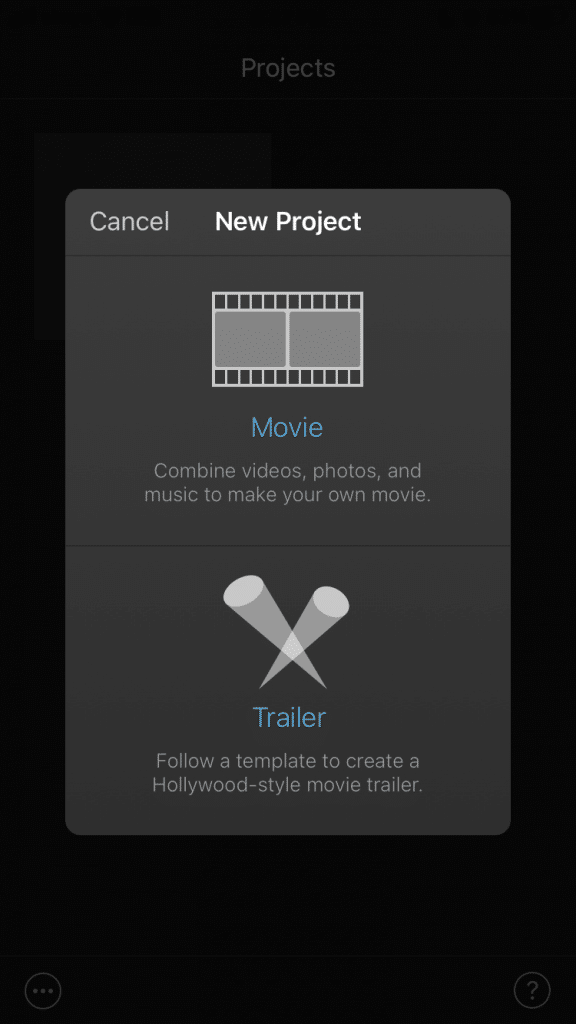
- On the project type selection screen, choose “Movie”
- A screen containing all your photos and videos will show up. Select your time-lapse video and tap “Create Movie” at the bottom of the scren
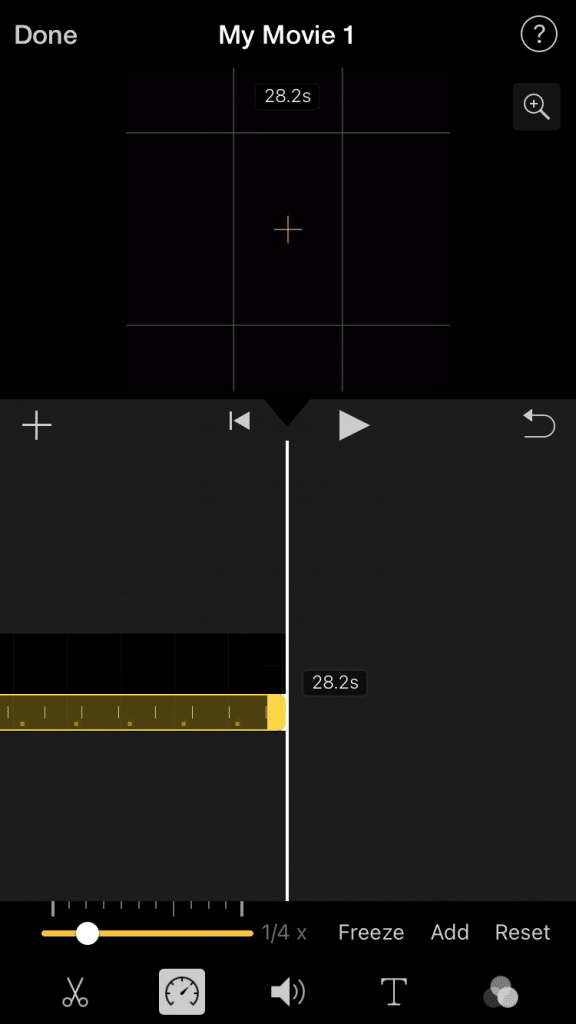
- On the new “My Movie” screen, you will see a timeline with your time-lapse video. Tap it.
A yellow editing border will show up around the lower bottom of your video, and some editing options will appear on the bottom of the screen
- Tap on the speed meter icon on the bottom of the screen. A range slider to select the desired video speed will appear. Adjust it to your preferences.
Moving the slider to the left will make the video reproduce as slow as 1/8x and moving it all the way to the right will make it reproduce as fast as 2x.
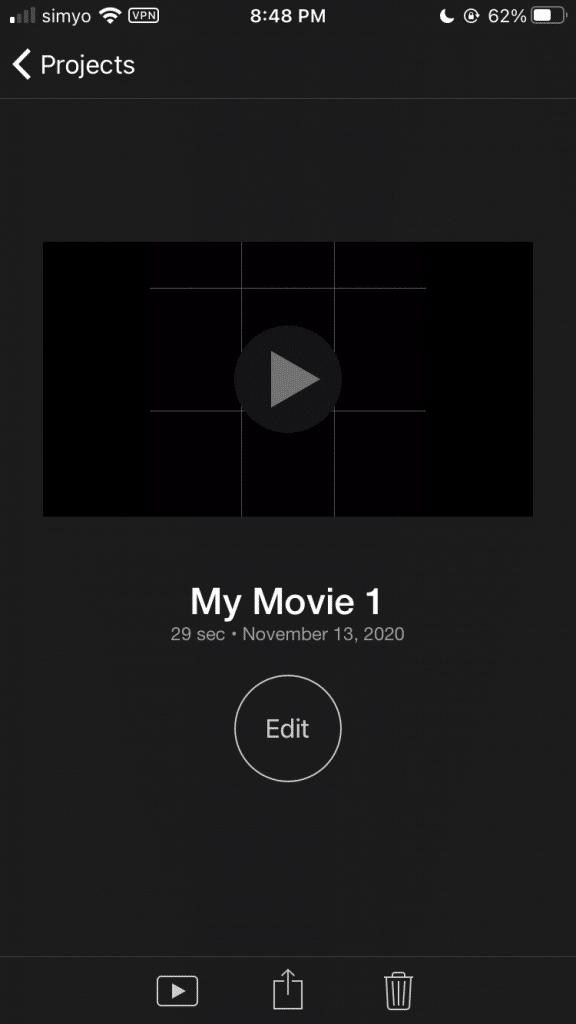
- Tap “Done” on the top left corner. In the project screen, tap the share button and save it or share it!
To save it to your camera roll, just scroll down and tap “Save Video”. You can also share it to any app you have on your iPhone, such as Instagram, Youtube, Twitter…
- If the final speed of your time-lapse video is not what you’d like, you can repeat the steps above using the new exported video to keep slowing or speeding up your time-lapse on iPhone


How do you speed up a time lapse on iPhone?
Just like it happened when we were discussing about how to slow down a time lapse on iPhone, there’s no immediate way of speeding up a time lapse. But you can definitely do it! First, record your timelapse on the iPhone as usual and then import the video into a video editing software like the iMovie app on iPhone to manually speed it up. There’s detailed steps on the how to slow down a time lapse on iPhone section, just follow the guide but instead of adjusting the video to be slowed down, use it to increase it speed!
How long can a time lapse video on iPhone be?
Many people wonder how long can an iPhone record a time lapse – and the answer is rather simple: you can record for as long as you want (or rather, for as long as the free space on your device –and the battery– can keep up).
First thing you want to do is connect your iPhone to a power outlet if you’re going to record for longer than 30 minutes. The battery on your device will drain quickly while recording a time-lapse.
Next, if you plan to record for several hours, better clean up storage on your iPhone to make some room for the time-lapse files and make sure you won’t run out of space in the middle of your precious timelapse. A great idea is to start deleting unused apps, which make a huge chunk of the iPhone’s used space. Then, you could upload all your big videos and files to iCloud or Google Photos and remove them from the device, or you could also physically connect your iPhone to your Mac or PC using a lightning cable and manually transfer all your files there using Photos, iTunes or any iPhone management software. One trick we like is the following (it only works on macOS):
- Connect your iPhone to your Mac with the cable your iPhone uses, such as a Lightning cable.
- Press command + spacebar. In the box that pops up, write “Image Capture”. The following app will appear in the list. Click it to open it.
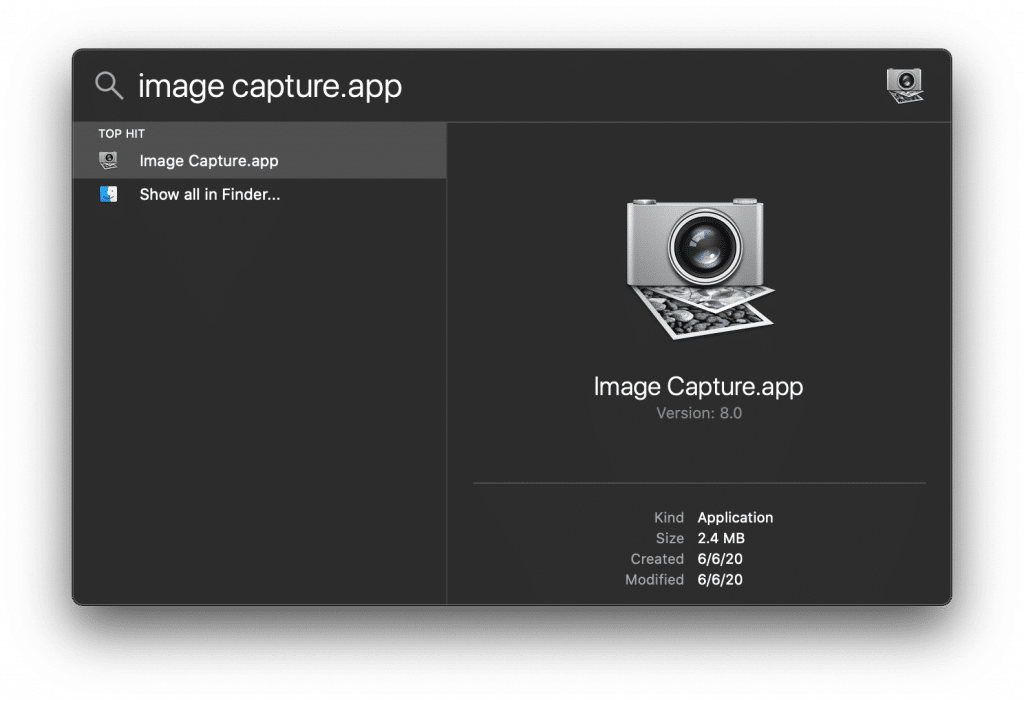
- Once the app opens, your iPhone will be listed under “Devices” on the left pane. Click your iPhone and all its photos will be listed on the main area. From there, you can just select all the pictures you want to import and hit the import button to copy them to the folder you choose on your Mac.

Once your files are safely copied into your computer, you could remove them from your iPhone, which will make a lot of extra free space for you to use when recording long time-lapse videos.
In summary, iPhones basically can timelapse for as much as there is available storage space and battery. If you only have a couple of MBs left, that will be a very short time (maybe a few minutes) – but if you have GBs and GBs of available space, your iPhone could record for hours and hours, even a day or two. Just make sure you do some testing with the actual intended length before going out in the field to record a critical and important long time-lapse, to avoid losing it because the device ran out of space.
How to add music to a time lapse on iPhone?
Adding music to a time-lapse on iPhone can be easily done with the iMovie app!
To do this, first you’re going to need iMovie, so go to the App Store, search for “iMovie” and download it if you don’t have it already in your iPhone! Open it and:
- Create a new project by tapping the big “+” plus icon on the main iMovie screen
- Select “Movie” as project type in the “New Project” screen
- Select your timelapse video from the Photos gallery and tap “Create Movie” in the bottom of the screen.
- In the “My Movie” screen that pops up, tap the “+” plus button by the center at the left of the screen to add an Audio file. In the list that appears, tap “Audio” and then select a track either from the Soundtracks section, from your own music or choose any of the default Sound Effects.
- Once the track is selected, tap the “+” plus button to add it to the Movie timeline. If you now hit play, your timelapse will already have the music you’ve imported into the project!
- Tap “Done” in the top left corner of the screen and then tap the share button in the middle. In the share dialog, select “Save Video” to save the time lapse with music to your Photos gallery, or share it directly on Instagram, Twitter, Youtube or any other app you have!
How to convert a time lapse video to normal on iPhone
A time-lapse video recorded on iPhone cannot be easily converted into a normal video just like that. This is because of the way the iPhone creates the time-lapse video: it doesn’t first record a full-length video that then it speeds up. Instead, it takes a bunch of still shots that then get stitched together into a time-lapse video.
But you can definitely use the iMovie app to slow down a time-lapse video on iPhone as we mentioned earlier, but if you end up slowing it down too much, it will look unnatural, because at the end of the day your time-lapse video is made out of still images, not video.
How to convert video to time lapse on iPhone
This is an easy one! Just as we did when we were talking about how to speed up an iPhone time lapse video, you could use the exact same method to take a normal video, import it into the iMovie app, speed it up and end up with a video that looks just like a time-lapse! There’s a step-by-step tutorial on the section about how to slow down a timelapse on iPhone.
How to create time lapse video from photos on iPhone
As far as we know, there’s no easy way to do this on iPhone just yet, but if you come across some way of achieving the task of creating a time-lapse from still photos on iPhone, please leave a comment below!